Show or adjust the banner by region
ClearConsent can change how the banner behaves depending on where a visitor is — for example, asking for opt-in consent in some regions and using a lighter notice elsewhere. You decide the regions and the behaviour; ClearConsent applies the rule.
Open Geo-targeting
Go to Settings → ClearConsent → Geo-targeting. Here you set a default behaviour for everyone and then add rules for specific regions.
Choose a behaviour per region
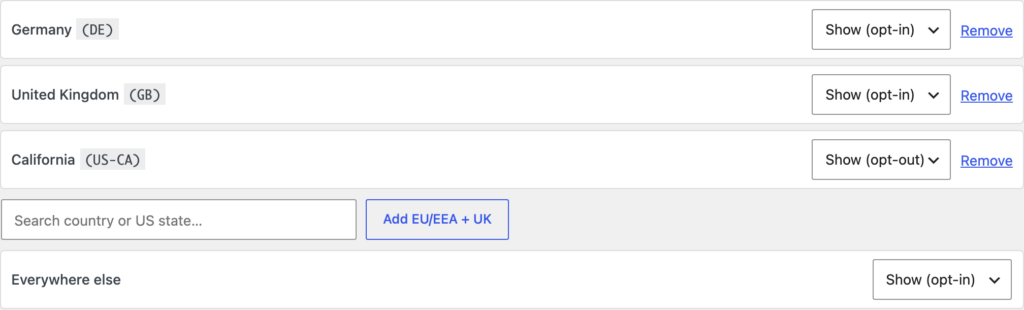
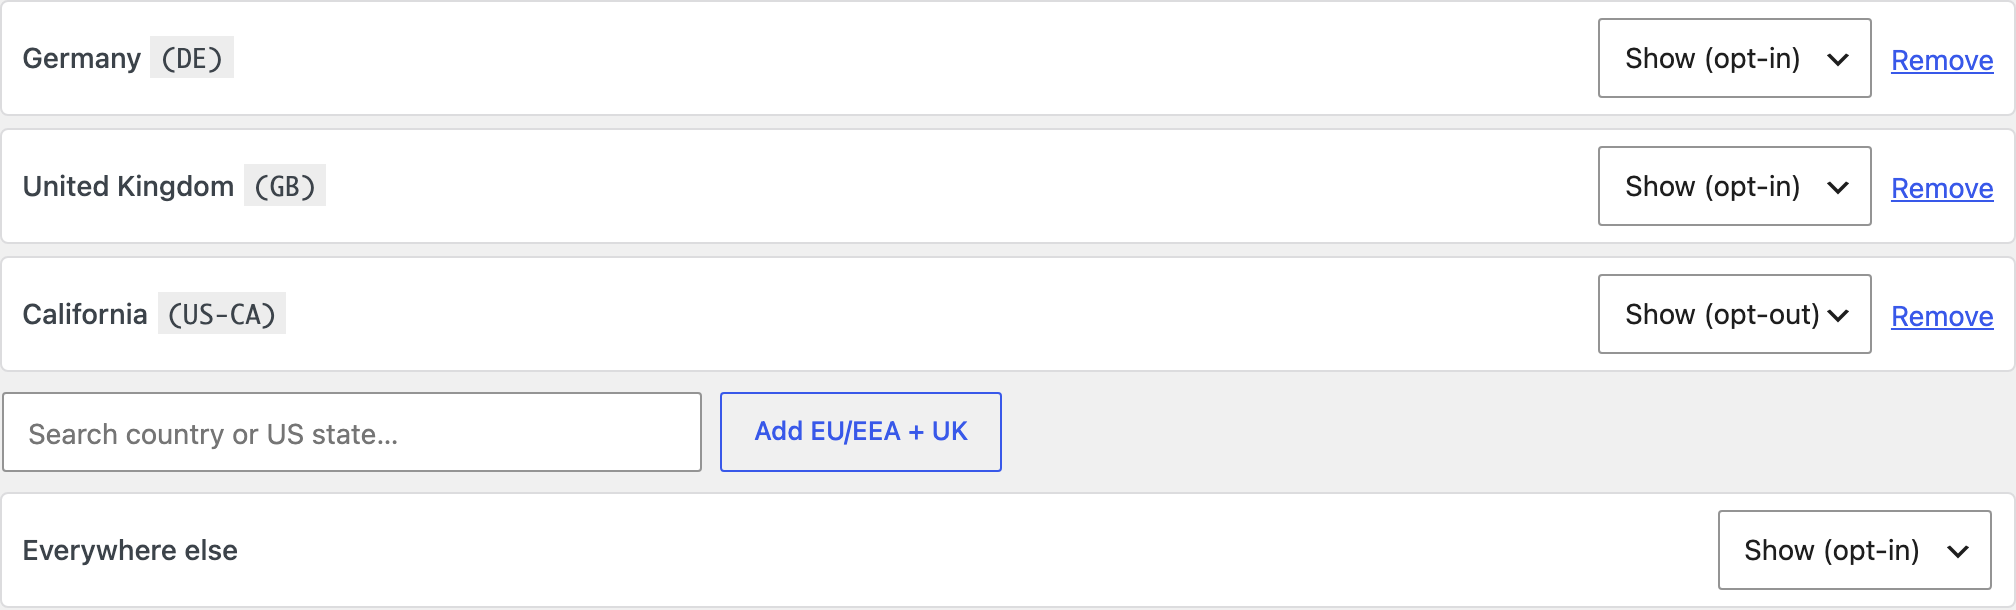
For each region you can choose how the banner acts:
- Opt-in — optional services stay off until the visitor agrees.
- Opt-out — optional services run unless the visitor turns them off.
- Hide the banner — no banner is shown in that region.
You set a default behaviour for visitors who don’t match any rule, then add region rules on top. There’s a shortcut to add the EU/EEA and UK as a group.
Target countries or US states
Rules can match whole countries or individual US states, so you can treat (for example) California differently from the rest of the country.
How ClearConsent knows the region
ClearConsent reads the visitor’s country from a header your host or CDN adds to the request (such as Cloudflare’s CF-IPCountry). If your host doesn’t add one, geo rules can’t tell where a visitor is and everyone falls back to your default behaviour.
CF-IPCountry reaches WordPress.Preview a region
While logged in as an administrator, add ?cc_region=DE (or any country code) to a URL to preview how the banner behaves for that region without leaving your country.
Geo rules and page caching
Region detection happens on each request, so it works alongside page caching. If you also use Global Privacy Control handling, that signal is honoured independently of the region. For more on caching, see Use ClearConsent with page caching.
Geo-targeting lets you match your own regional approach — it doesn’t tell you which approach a given region requires. Which regions you target and how you treat them is your decision; ClearConsent doesn’t determine your legal obligations.