Customize your banner text and buttons
You can change everything visitors read on the consent banner — the title, the description, the buttons, and the privacy-policy link — plus where the banner sits and whether it uses a light or dark scheme. All of this is on the free plan.
Where to edit the banner
Go to Settings → ClearConsent. The notice text lives in the Consent notice text section, and the buttons and links are just below it. Save, then reload your site in a private window to see the changes.
Notice title and description
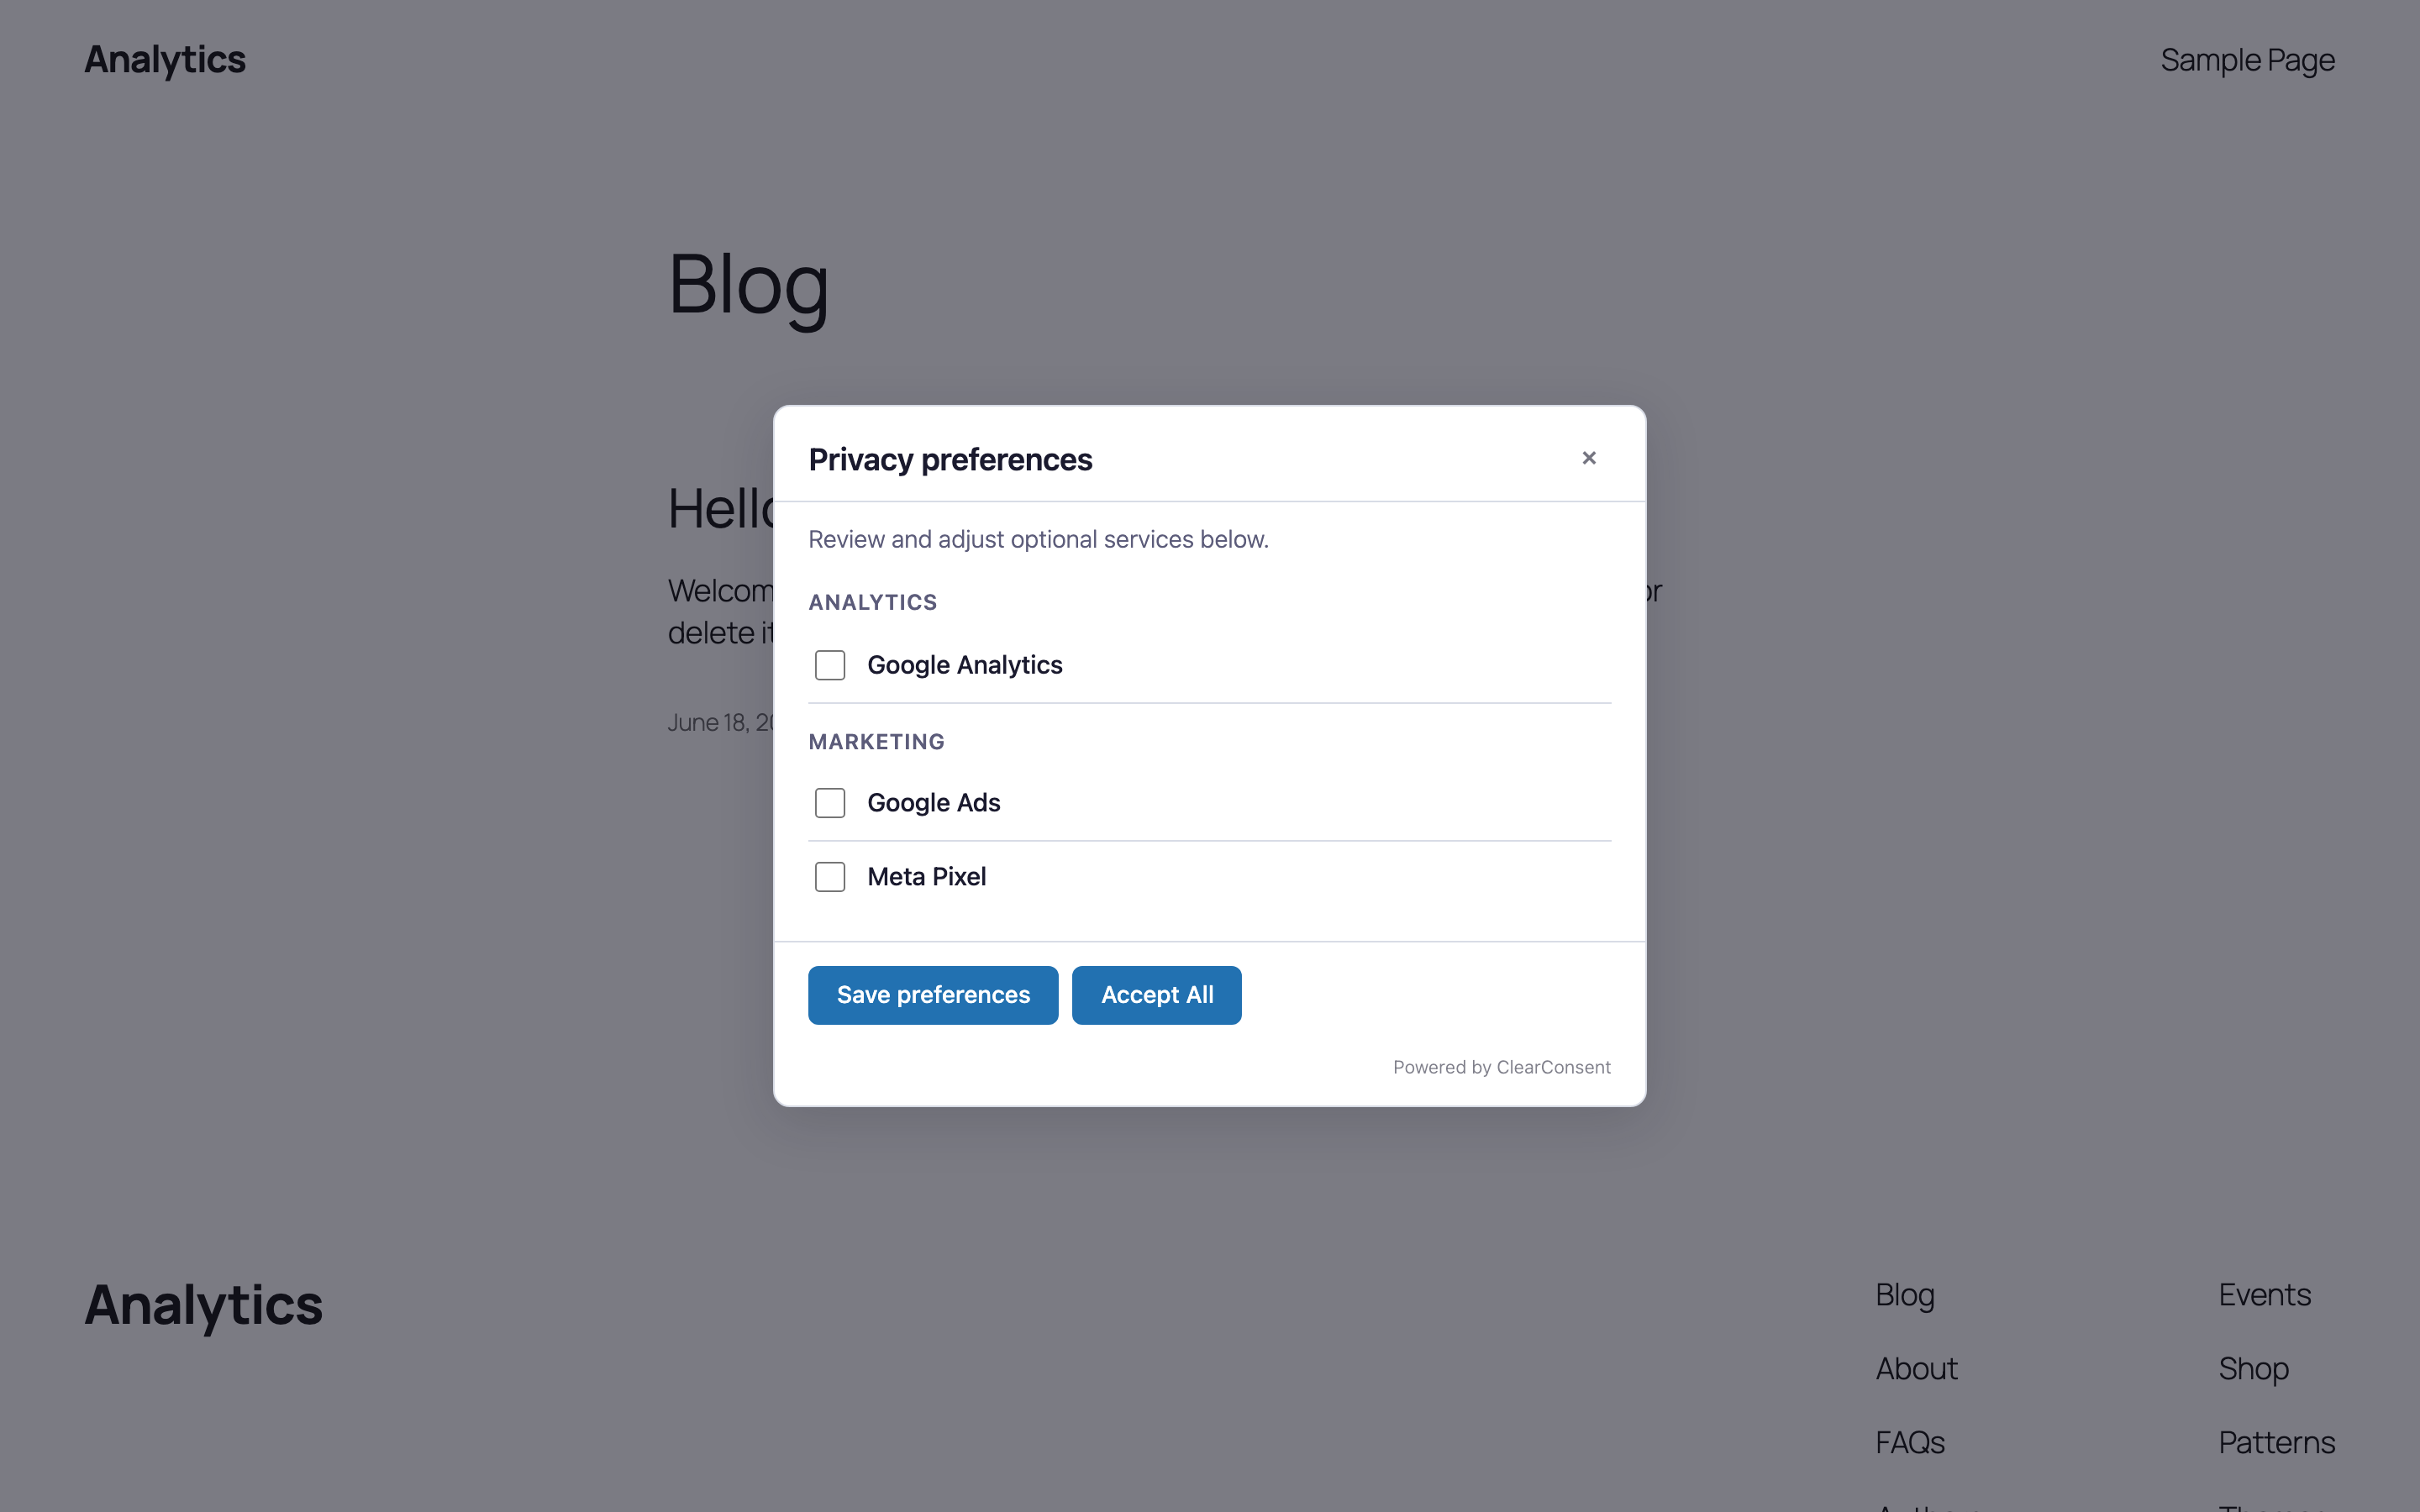
Set the title (for example, “We value your privacy”) and the description shown underneath. You can also toggle whether the title and description appear at all, and add a privacy-policy link so visitors can read your full policy.
{purposes} in your description and ClearConsent replaces it with your configured category names (for example, “Analytics, Marketing”).Buttons and links
Choose which actions the banner offers:
- Accept all — grants every optional service.
- Required only / Decline — lets visitors refuse optional services. Keeping a clear refuse option visible is good practice; ClearConsent lets you show or hide these buttons.
- Learn more — opens the preferences modal, where visitors turn individual services on or off by category.
Position and light/dark scheme
Pick where the banner appears (for example, a bottom corner) and whether it uses the light or dark scheme. Position and light/dark are available free; full color, font, size and mobile control is covered in Style the banner to match your brand (Pro).
Preview the result
Open your site in a private/incognito window to see the banner exactly as a first-time visitor would. The preferences modal (opened by “Learn more”) lists your services grouped by category: